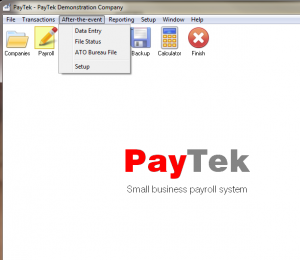
The PayTek after-the-event feature allows you to process payroll data from manual records in order to print reports or payments summaries and create the ATO file at year end.
It provides very efficient data entry and review as well as options to generate an ATO payment summary file for multiple payrolls (ideal for payroll bureaux).
You also have the benefit of the full PayTek payroll system for reporting etc. This addendum assumes you are familiar with using PayTek and that you have entered your employees and pay item files. Refer to the PayTek manual for information on setting up the payroll file. At the very least you will need one pay item established for each of the payment summary fields, (ie Gross, Deduction, Allowance1 etc).
Activating After the Event processing
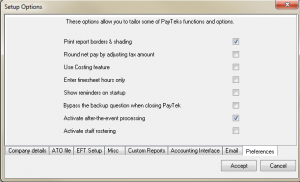
After you have created your first payroll company, we have to activate the After-the-event option in PayTek.
Just tick the box on the System Setup screen and the new menu options will appear.
Setup supplier information
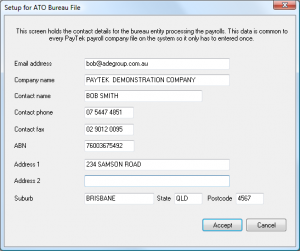
Because PayTek allows you to send payment summary data for multiple company files, we must enter the contact details for the “bureau’. Fill in all the details as these go into the ATO file. You only have to enter these details once as they are used by the system in every file.
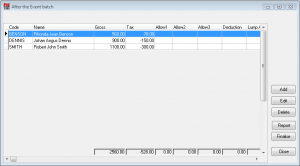
Processing After the Event batches
After-the-event processing is done in batches to assist with data entry and tracing transactions. Because we are processing payment summary information, the batch listing shows each item from the payment summary entered with totals at the bottom.
After the pay records have been entered into the batch it is finalised which adds it as a payrun into the PayTek file and updates the database.
Depending on your base records, you may enter a batch for each payrun or a batch for each employee. After entering the batch you can print a batch listing for checking and then finalise the batch.
Any errors discovered can be corrected by entering an adjusting entry (on the same date if required).
If you have to enter ETP information you should use a normal PayTek payrun and enter the ETP data via the Payroll data entry screen. These payruns are finalised as normal from the transactions menu.
You can process contractor type payment summaries if necessary in the same way that you would set them up in PayTek normally.
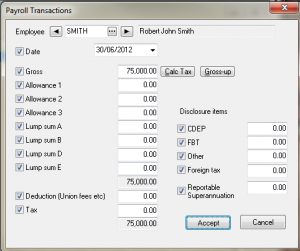
The data entry screen is used to enter the payroll information for each employee. It is designed for efficiency so you can enter data quickly with the keyboard only.
Tick the fields that you are going to use so the cursor will jump over those not ticked. (You can always override this by clicking on any field with the mouse).
The date field allows you to reconstruct each payrun if necessary to crosschecking.
When the batch is finalised you will see each field is mapped to the appropriate pay item in the PayTek file. This ensures the integrity of the payroll information and means you can mix after-the-event data with normal payroll payruns.
If you are processing pay information from cheque stubs you can use the Gross-up button that will calculate the gross and tax from the net figure entered. This relies on the tax table setup on file for the employee.
You can also get PayTek to calculate the tax on a gross amount by clicking the Calc Tax button.
Finalising the batch
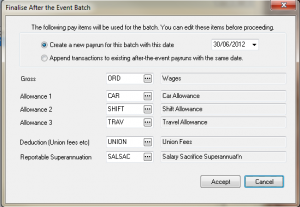
Before finalising each batch you must specify what PayTek pay items to use for each of the payment summary fields. This ensures the payroll file integrity is maintained. These are held as defaults for each batch. You must specify a pay item for each category even if they are not used.
You can also elect to create a new payrun in PayTek for this batch or to append the transactions to any existing payruns with the same date.
This allows you to reconstruct the payroll by either processing pay period as one batch or you can process each employee’s wages per batch and append them to the pay period.
Accepting the batch updates the payroll file and clears the batch.
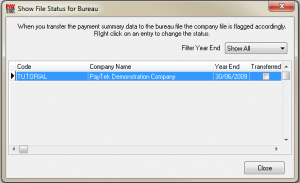
Checking status for Bureau file
This allows you to see and update the processing status for each payroll file. As each company is processed you transfer the payment summary information to the bureau file which is then used to create the reporting file for the ATO.
Reviewing the data
After entering the batches you can run all the PayTek reports for information about the payroll data. The highlighted payrun in the above illustration shows the after-the-event batch item. The other payruns are normal PayTek payruns showing how you can mix the two as required.
End of year processing
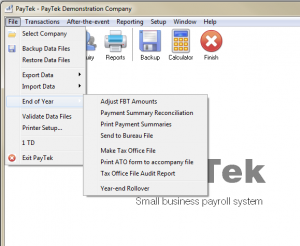
At year end you can follow the normal PayTek year end procedure to print payment summaries and finish the file.
However, there is an additional option to send the data to the “Bureau” file. This allows you to create a bureau file of multiple payroll files to send to the ATO at year end. Of course you can always send the files individually as you would with any other PayTek payroll file.
Creating the Bureau File
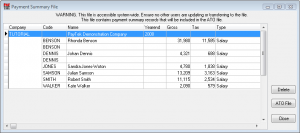
The final step to processing our after-the-event payroll files is to create a payment summary file for the ATO. The ATO Bureau File option shows you a listing of every company file transferred and each payment summary record for each employee.
You can easily delete an employee record by highlighting it and clicking Delete or you can remove an entire company by highlighting the company record and clicking Delete. You can always load a company and transfer the data to this file again after making corrections etc. You will be warned about replacing existing records if relevant.
When the ATO file has been created it is sent off to the ATO with the accompanying form that can printed from PayTek. Or you can use the ATO ECI system to send it via the internet. This has the advantage of validating the data file before submitting it.
