The PayTek rostering feature provides a simple way to manage your staff roster.
The roster screen provides a graphical view of your roster on a week by week basis.
It allows you to revise and edit your roster, then print it or email it to your staff. To save time you also have the option to load the rostered times into each payrun as a starting point.
To speed up this process each rostered time has a pay item attached to it.
Employee Setup for Roster
First step is to set up each rostered employee. This means editing their details and adding some default values that will make using the roster easier.
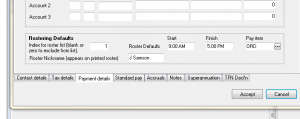
In Employee Data go to the Payment details tab and you will see the Rostering defaults.
The index number determines the order that the employees appear on the roster screen and also whether they appear at all. If you enter a zero or leave it blank the employee will not appear. (This makes it easy to exclude your full time staff or management).
Any employees with the same index number will be listed together in name order so you can use 1 for everyone.
Start and Finish time
Enter these defaults for each employee. This will save you some time when you enter times onto the roster.
Pay Item
Enter a default pay item for each time on the roster. This will typically be the “Ordinary Time” pay item you use.
Roster nickname
Because there is limited space when printing the monthly roster, you can give each employee a nickname (part of their name etc) that will appear on the roster printout.
Creating and maintaining the roster
Now that we have established some defaults for our employees we are ready to create our roster. Below is the Roster screen.
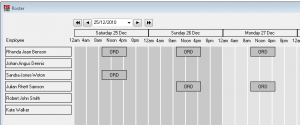
The roster screen shows a week at a time. Weekends and public holidays (Enter public holidays from the setup menu) are shaded darker for your reference. You can change the starting date by changing the date or clicking the buttons to move back or forward by a week or a day.
Each employee with a roster index number is listed in that order on the screen.
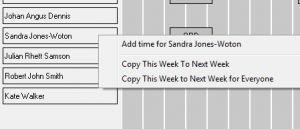
To add a time to the roster click on the employee or right click and select the option as below.
Add Time

To add a time to the roster we enter the date and a start time and finish time. You must also specify a pay item for the time. (This is used when loading the roster into a payrun for your employee.
Click on the calendar to select the date (Click the month or year heading to move back and forward by month or year).
Enter the start and finish times. (Click the dropdown to “click and select” the time.)
The Reset to Standard button resets the time to the default previously set up in the employee data screen.
When you accept the time it will appear on the roster. (Overlapping times are not allowed.).
Editing a Roster Time
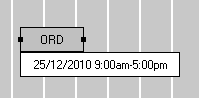
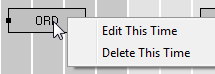
You can edit the roster directly or edit each roster time by right-clicking on it to select the menu item.
Click on a time on the roster to make it active. You can then move it by dragging and dropping it to a new position. (Notice the move cursor below)
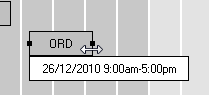
You can also change the time by clicking on the tabs at each end and dragging the cursor. (Notice the sizing cursor below with a “double line”)

The maximum period is 24 hours for any one time entry. It can overlap a day but will only appear on the starting day.
Cloning a time
This is a quick way to copy an existing time to the next day etc. Click on a time to make it active then hold down the Control Key.
Click and hold the left mouse button and drag the cursor to the new time. When you release the mouse button the new time will be copied.
Copying to next week
Once you have finished the first week of your roster you can copy it to the next week as a starting point. This will save you a lot of time. You can do this for everyone or for one employee at a time.
Printing the roster

The roster prints on a monthly basis fitting on one page. 6 employees can fit on each page. If an employee’s roster extends past one page it will print extra pages until that employee is completely printed.
The email option allows you to easily email a copy of the roster to each rostered employee. This is in PDF format.
Loading the roster into a payrun.
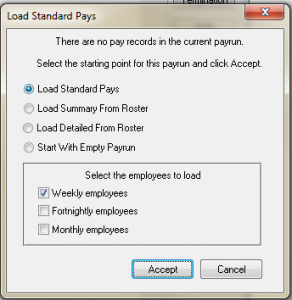
When you start processing a new payrun you can choose to load the roster information into the payrun as a starting point.
Load Summary from Roster
PayTek will sum the hours for each pay item on the roster and create a transaction for each.
Load Detailed from Roster
PayTek will create a pay transaction for each time on the roster showing the details.
Note: If you have a mixture of standard pays and rostered employees you should choose a “best” option to load. You can then load from standard or roster on an individual basis as required when processing your payrun. Below shows these options on the payroll screen.